As we have claimed lately, Hubitat is an ideal choice for home or office automation, offering everything we need for this: compatibility with a multitude of Zigbee, Z-Wave or Wi-Fi devices, local connection, internal applications, friendly dashboard and more.
If we want to start forming an intelligent system, but the Ethernet cable connection is not suitable for our needs, with the latest update, Hubitat introduces the possibility to connect wirelessly to the internet.
All we need is an OTG cable, a Wi-Fi adapter and to follow a few simple steps in the Hubitat interface.
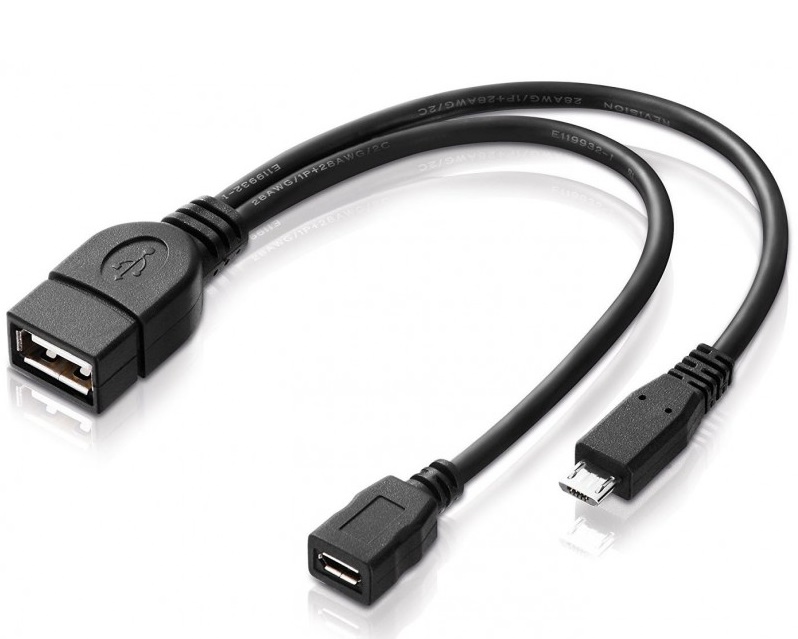
1. OTG cable + power cord
With the help of this adapter we will be able to power the hub and, at the same time, we will be able to connect USB devices (in our case the Wi-Fi adapter).
2. Install the Wi-Fi drivers
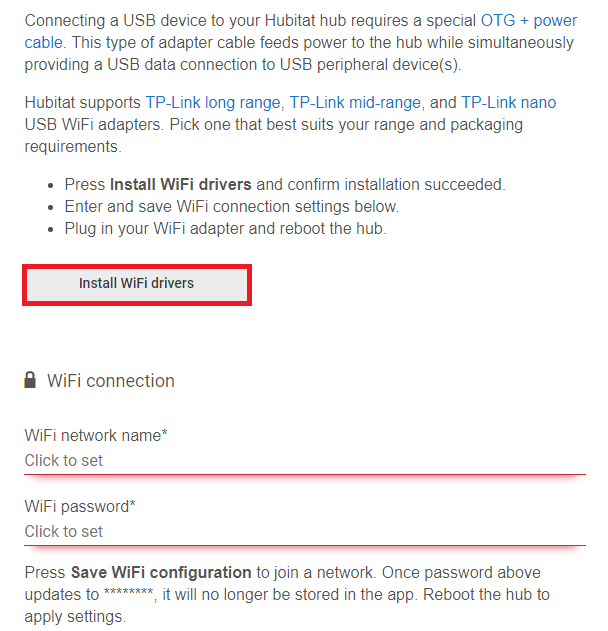
In order to use the wireless adapter, it is necessary to install Wi-Fi drivers from the Hubitat interface. We will access the Settings -> Networking section, then click on the “Install Wi-Fi drivers” button.
3. Enter the name and password of the Wi-Fi network
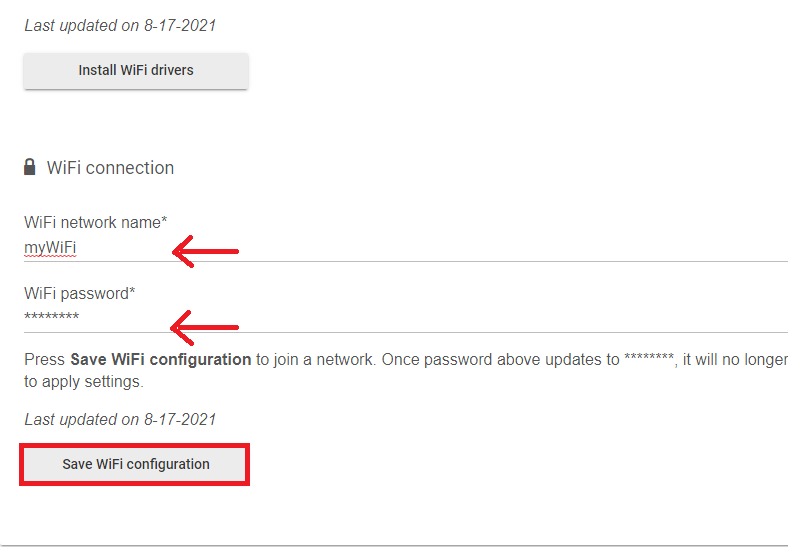
After we have successfully installed the drivers, we will have to enter the name and password of the wireless network we want to connect to, then click on the “Save Wi-Fi configuration” button.
4. Connect the Wi-Fi adapter and restart the hub
If all the above steps have been followed successfully, we will connect the Wi-Fi adapter to the USB port of the OTG adapter. The last step will be to restart the hub for all settings to take effect. For this we will go again in the Settings section, then click on “Reboot Hub“, after which we will be able to remove the Ethernet cable from its port, in case we used such a connection.
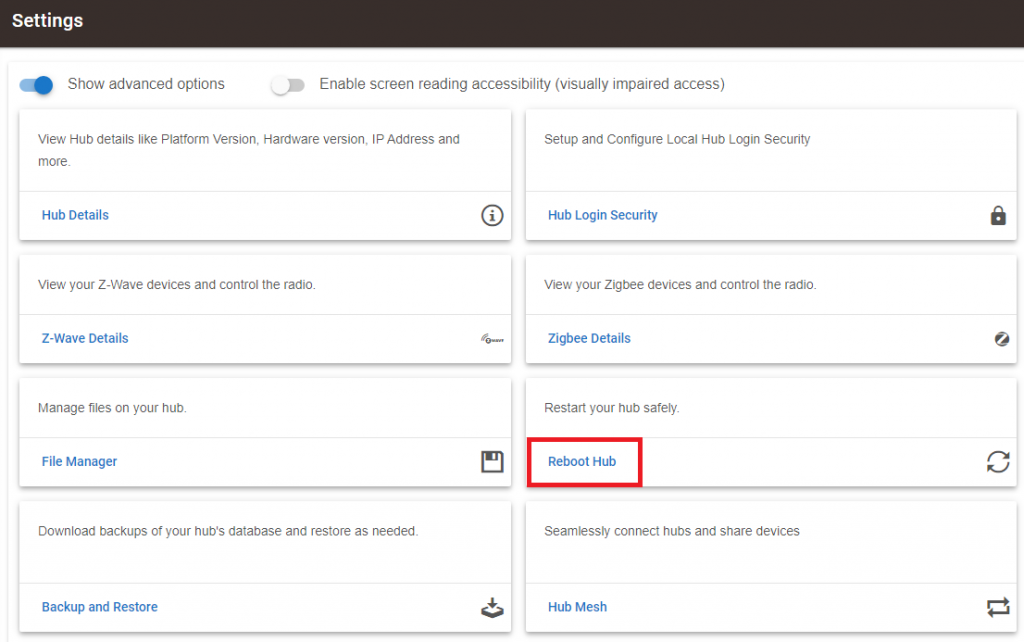
After rebooting, our smart system will be connected to the internet via the Wi-Fi network.
For a better signal between the hub and the router, we recommend using a suitable adapter, depending on the distance between them. We have successfully tested 3 adapter models from TP-Link: TL-WN725N, TL-WN823N and Archer T2U Plus.
